Thursday, April 16, 2015

Makeup 101: Which Foundation Brush Do I Use???

Hello Beauties!

Once upon a time I was a makeup beginner.  There were so many types of foundation brushes out there, I had no clue where to begin!  Through trial and error, I figured out which brush worked best for the look I was trying to achieve.  It took a while and I really wish I had some guidance.  This blogpost will be going through types of foundation brushes and application.

Foundation Brush, Buffing Brush, Stipple Brush, Sponge
I will go  through the basic foundations brushes that you might encounter when your are at a makeup counter.

Foundation Brush

This is the first type of brush I ever owned.  It's funny this is the first brush I used because I feel it provides the most coverage.  It really reminds me of a painter's brush and you use it the same way.  You brush on the foundation in strokes over the face.  I would recommend starting in the middle of the face and work your way out in downward strokes.  Why downward strokes you may ask?  Its to brush any fuzzy facial hairs down so they go undetected.

Buffing Brush 

Theses brushes are very dense and the brush hairs are tightly packed.  In my opinion, this provides a medium coverage and really works the foundation into the skin.  I recommend dotting the foundation over your face and using the buffing brush in circular motions to work it into the skin.

Stippling Brush

This brush is multi-functional so I will always have a brush like this in my collection.  When it comes to foundation, it really provides a lightweight "your skin but better" look.  I use this brush when I am in a hurry and my skin is behaving itself.  I recommend dotting the foundation over your face.  Then take the brush and work the product in with circular motions.

Note: Once you apply the foundation with any of these brushes, you may see some brush strokes.  Actually you will definitely see some brush strokes!  Just keep working the product into your face and allow the brush to ultimately buff the strokes out.
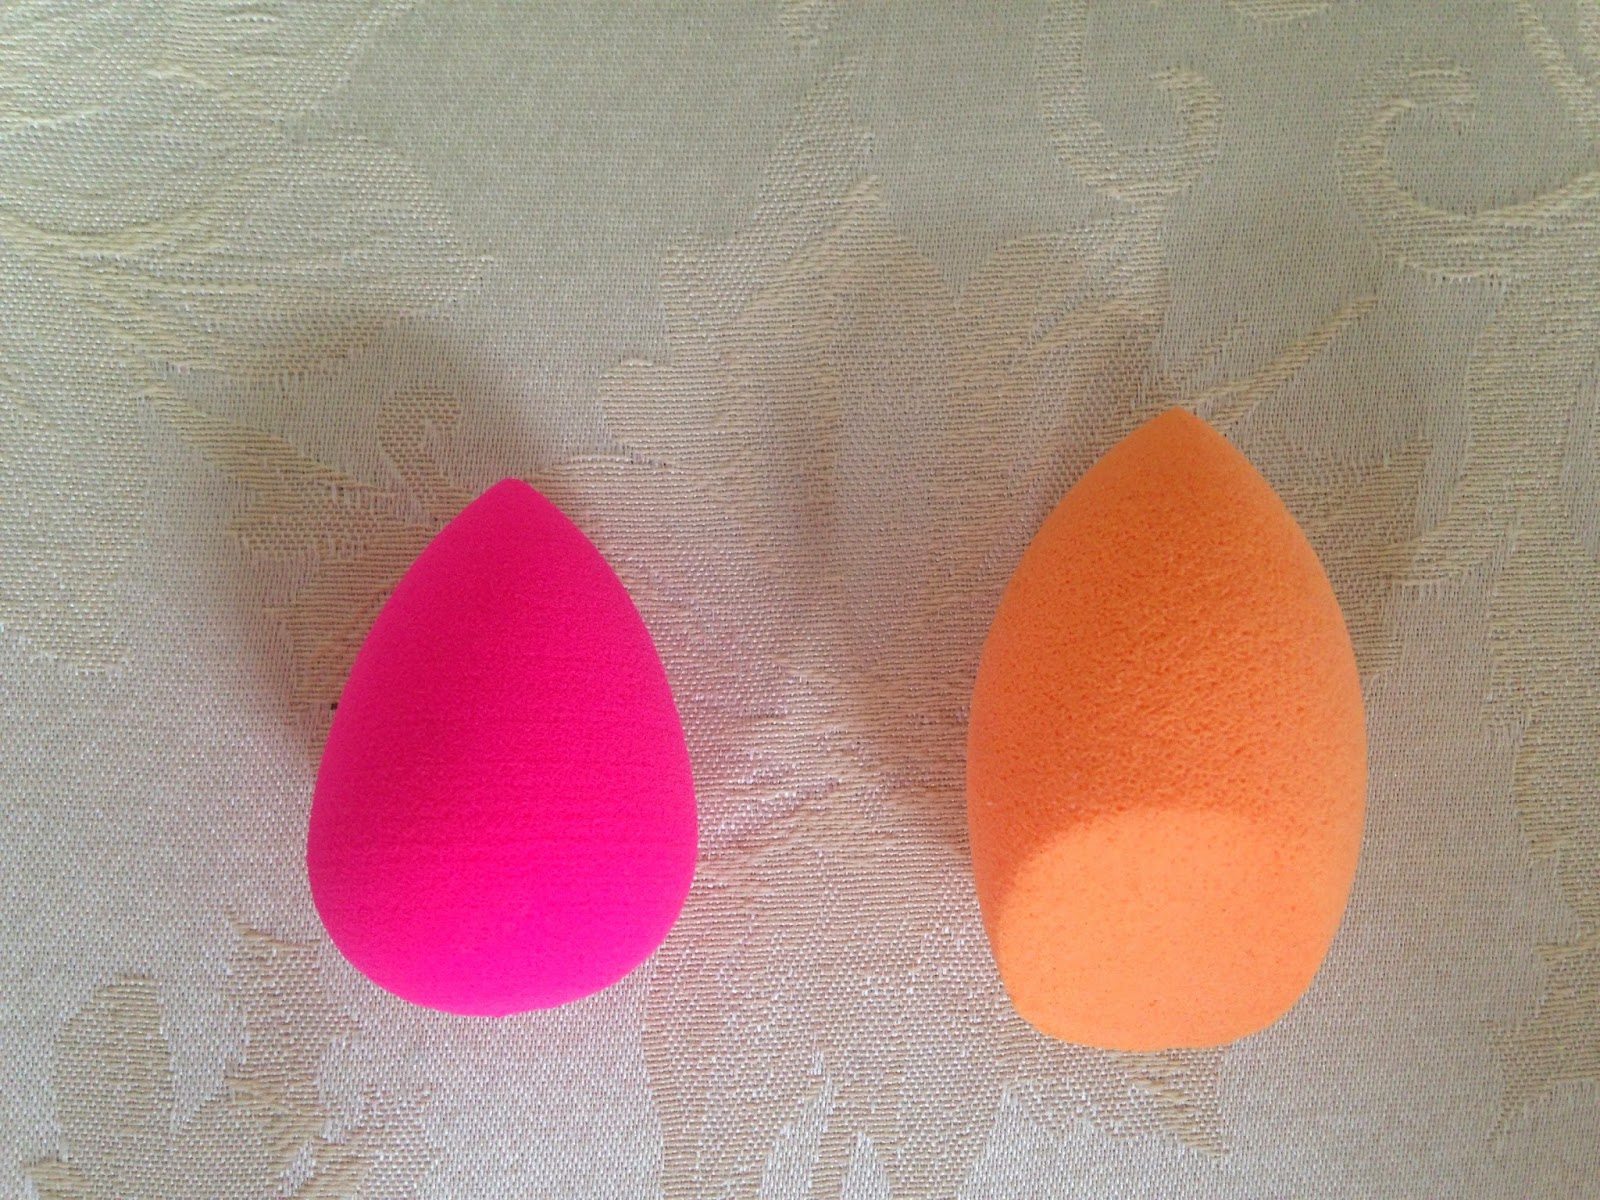
Sponge

This is my FAVORITE way to apply foundation.  I will typically use the sponge wet and bounce the product onto my skin.  I usually start off with the foundation dotted all over the my face and pounce it on.  This technique, in my opinion provides the most flawless coverage.  I usually start off with one of the brushes to get the makeup all over my face and finish off with the sponge.  Love this method of application.

I hope you all enjoyed this blogpost.  If you have any questions, comments, feedback, or requests, please leave them down below.  Don't forget to follow my blog to stay up to date!  Follow me on social media...all the links are in the sidebar.  Also feel free to email me at geektochicbeauty@gmail.com.  Stay Beautiful, Stay True!

Geek2Chic - Christine

Wednesday, March 25, 2015

Worth the Hype??? Anastasia Beverly Hills Liquid Lipstick

Hello Beauties!

Is it me or are Liquid Lipsticks all the rage nowadays?  When Anastasia Beverly Hills came out with these Liquid Lipsticks I was so excited.  I got even more excited when I saw several YouTubers talking about them.  They looked so beautiful and opaque with such a beautiful array of colors!  I just had to get my hands on them.  I have been playing with these colors since I got them and this blogpost will answer the question....Are they worth the hype???

The Facts:

These lipsticks are available at anastasiabeverlyhills.com, Macy's Impulse in-stores or macys.com.  There are 20 colors available and they retail for $20.

Pure Hollywood, Lovely, Sad Girl 
The Claims:
  • Full coverage, intense pigment, and a matte finish in an easy-to-apply liquid formula.
  • One sweep delivers vibrant long-wearing color that sets all day. 
  • Formula is ultra-pigmented. Swirl wand around tube to evenly mix color before application. 

In my Geeky Opinion:

This line offers a huge array of colors, from the nudes to the vampy deep colors to the brights!  I do wish there was a deeper nude or a dusty rose/mauve color, but you can't have everything.  Otherwise, you can really find any color you desire, especially when it comes to the spring time appropriate colors.  The colors are pigmented and go on opaque.  They dry to a matte finish and are long lasting.   

They swatch beautifully as you can see.  


Top to Bottom: Pure Hollywood, Lovely, Sad Girl
Just a few observations and recommendations....
  • If you have dried or chapped lips, make sure to exfoliate them before application.  
  • I noticed they wear from 8-10 hours, however I did apply lip balm throughout the day for some moisture.  
  • They are mildly drying on the lips.  
  • I recommend wiping off the doe-foot applicator within the container before applying the color onto the lips.  
  • I have also been using a lip liner before and after application to sharpen up the edges of the lip.  They do not bleed but it really evens out the application when you use lip liner.   
  • They dry to a matte finish but Sad Girl has a bit of shimmer.  So although the base color is matte, you can appreciate some shimmer on the lips, which I love! 
  • To fully remove the color from your lips, I recommend an oil-based makeup remover. 
The Final Verdict:

I really enjoy these products.  They go on smooth and opaque and are very long lasting!  All the things I look for in a lip product.  I am the type of girl that gets lazy and won't re-apply once the color fades.  With the ABH Liquid Lipsticks, they wear well so I don't have to reapply.  I just keep my lip balm on hand for some moisture.  I really do think these are worth the hype and I highly recommend them!  

I hope you all enjoyed this blogpost.  If you have any questions, comments, feedback, or requests, please leave them down below.  Don't forget to follow my blog to stay up to date!  Follow me on social media...all the links are in the sidebar.  Also feel free to email me at geektochicbeauty@gmail.com.  Stay Beautiful, Stay True!

Geek2Chic - Christine 

Wednesday, March 18, 2015

Save or Splurge? GLAMGLOW Supermud Clearing Treatment

Hello Beauties!

If you follow me on Instagram, you may have seen me purchase the GLAMGLOW Supermud Clearing Treatment for a "steal".  I went into Marshall's to peruse and ran out of there with this product.  I was so excited!  It has been getting so much hype in the beauty community and I have been dying to try this product for such a long time.  I have been putting it to the ultimate test for Geek2Chic research purposes.  So...Is it worth the splurge?  Keep on reading!

Please note that there are several GLAMGLOW Products.  I will be exclusively reviewing the Supemud Clearing Treatment (white packaging).


The Facts:

This products can be found at Sephora, Neiman Marcus, glamglowmud.com or amazon.com.  It retails for a whopping $69.99.  I purchased mine at Marshall's for $39.99.

It is formulated without parabens, sulfates, and phthalates.

The Claims:

According to the Sephora website, this product claims to...
  • Help fight all common skin concerns including breakouts, discoloration, black and white heads, razor bumps, and ingrown hair. 
  • Powerful, skin-clearing mud visibly draws out dirt and congestion while a proprietary six-acid blend dramatically brightens and softens skin. 
  • It works to magnetically draw out dirt and pores with activated-X charcoal, leaving skin smooth and healthy-looking. 

How to use?
  1. Apply a thin layer to clean skin and leave on for 5 - 20 minutes. 
  2. Remove with water. 
  3. Use as often as needed as a full mask or as a spot treatment. 
A few precautions before using this product.... Keep this product away from your eyes.  It may also increase sun photosensitivity.  Basically, don't use this product before box-tanning or going out in the sun.   Also, if you have an open wound, do not use this product.  

In My Geeky Opinion:

Let me start by talking about first impressions with use of this products. The smell is quite strong and smells of mint and licorice.  When I used it as a mask, the scent was so strong that it made my eyes tear a bit.  I eventually got over this and with subsequent uses it didn't really bother me.  


For the most part, it goes on smoothly but you do notice some grittiness in the texture.  It goes on dark gray that looks like charcoal and dries to light gray.  While it dries you start noticing your pores and any blemishes on your skin become very exaggerated.  It is cool and gross at the same time.

I tried cleaning it off my face over the sink and made a huge mess!  I recommend jumping into the shower to clean it off with warm water because it is a bit difficult to fully remove.  It would leave my skin feeling mildly dry, tight, and cool.  I do recommend moisturizing after use of this product.

After the first few uses of this products, I noticed more blemishes then before!  It really purged my skin.  I felt my skin was smoother and softer but I started breaking out like nuts.  Not small breakouts, but deep cystic acne breakouts!  I was having PTSD!  If you have been reading my blog you know I have combination skin.  I suffered from cystic acne for years during my mid to late twenties.  Now my skin has been getting so much better but I will get hormonal breakouts occasionally.  I thought maybe its just me and my skin type that are prone to these breakouts.  


So, I convinced my husband to try it out with me to see how his skin reacts.  His skin is clear and normal; not too dry and not too oily!  He will get a pimple every now and then but its very few and far inbetween.  His skin had the same exact reaction.  This product really purges the skin!  He broke out like I have never seen before.  He had huge cystic acne lesions especially in his beard.  He got angry and needless to say, he never used it again.    

I decided that instead of using it as a mask, I would use it as a spot treatment.   It will bring any blemishes to the surface more quickly.  Using it as a spot treatment, the blemish will cure a little faster but don't expect it to go away overnight.       

Final Verdict:

My final feelings on this product are MEH.  I do not like it as a mask because it makes me breakout.  I prefer it more as a spot treatment however I am not overly impressed.  Overall, I would not spend the money on it again.  I am going to finish off the remaining product I have now, but I do not plan on repurchasing it.  My advice is to SAVE your money.  Seventy bucks is a lot of money.  It better be a miracle worker if I am going to shell out that much money, and this product is not a miracle worker.  

I hope you all enjoyed this blogpost.  If you have any questions, comments, feedback, or requests, please leave them down below.  Don't forget to follow my blog to stay up to date!  Follow me on social media...all the links are in the sidebar.  Also feel free to email me at geektochicbeauty@gmail.com.  Stay Beautiful, Stay True!

Geek2Chic - Christine 

Wednesday, March 11, 2015

Epic Beauty Battle: The Original Beauty Blender vs. Real Techniques Miracle Complexion Sponge

Hello Beauties!

Welcome to another installment of Epic Beauty Battle!  If you're new to my blog, I will be comparing two products that I have found to be very similar and have been deemed to be dupes of one another.  I will give you a review of the products and my thoughts.  Today I will be comparing the ever so popular original Beauty Blender and the Real Techniques Miracle Complexion Sponge.  To put it out there, I LOVE these two products and use either one every time I apply makeup.

The Original Beauty Blender vs. Real Techniques Miracle Complexion Sponge
The Claims:

The original Beauty Blender claims....
  • An edgeless, non-disposable, high-definition cosmetic sponge applicator. 
  • The Beauty Blender ensures impeccable, streak-free application with minimum product waste. 
The Real Techniques Miracle Complexion Sponge claims...
  • Rounded sides blend large areas of the face with a repeated dabbing or stippling motion.
  • Precision tip covers blemishes and imperfections.
  • Flat edge for the contours around the eyes and nose.
  • Its versatile design evenly blends makeup for a smooth, enhanced finish, leaving you looking gorgeous.
The Facts:

The Beauty Blender

  • Versions: Original (Pink), Pro(Black), Pure(White), Red Carpet(Red)
  • Latex-free, non-allergenic, and odor-free
  • Retails for $19.95
  • Can be purchased at Sephora or amazon.com
The Real Techniques Miracle Complexion Sponge

  • Retails for $5.99
  • Latex-free 
  • Can be purchased at Ulta, Walmart, amazon.com, or RealTechniques.com


In My Geeky Opinion:

How to use:

The directions apply for use of both sponges.
  1. Wet the sponge with water.  I recommend placing the sponge under running water so it becomes saturated. Then I ring the sponge out.  Repeat this several times.
  2. Once completed, squeeze out all the excess water into a clean towel.  Each sponge will now look almost double its original dry size.  
  3. Now, you are ready to use the sponge!  Use it with your primer, foundation, concealer, or cream products.  I dab the product over my face first and then bounce the sponge to get an even, flawless finish.
  4. Clean the sponge and allow to air-dry.  
Beauty Blender Wet
Miracle Complexion Sponge Wet


How to clean:

I have tried liquid soap and solid soap but it doesn't get them clean enough!  I found the best way to clean both sponges is with the Beauty Blender Solid or Liquid Blender Cleanser.  These cleansers really get the sponges clean.  I do find that if you don't clean them after use, the sponges can get stained with product.  I find it harder to get the Real Techniques Sponge clean and back to its original color. 

*** Check my earlier Makeup 101: How To Clean Your Makeup Brushes for more details 

How long do these sponges last?

Disclaimer: I am a natural girl so I go makeup free more often than not.  These results may vary based on makeup usage.

I found that the Beauty Blender keeps its original shape much longer.  It took a good 6 months before I decided to get rid of it.  Even at the end of the 6 months, the shape was intact but it just looked too dirty to use.  After 2-3 months the Miracle Complexion Sponge started to wear and lose it's shape.  I found bits of the sponge fraying off.  

The Final Verdict:  

I have been using both products for a long period of time and I have re-purchased both several times.  That is how much I love both of these products.  I always reach for one or the other.  I love how they leave me with a flawless, even finish.  No streaks!  I admit that I love the texture of the Beauty Blender and the feel as I bounce it off my skin.  I wouldn't call the sponges "dupes" because the texture is different, however they leave the same finish on the skin.  I feel the Miracle Complexion Sponge absorbs more product than the Beauty Blender.  

Who Won?

I have to give it to the Beauty Blender!  I know it is more pricey, however I like the feel on the skin.  It lasts longer, looks cleaner and retains its shape.  If you are on a budget, go for the Miracle Complexion Sponge.  You will get the the same end result but I personally prefer the Beauty Blender.  Overall, I would recommend these products to anyone!

I hope you all enjoyed this blogpost.  If you have any questions, comments, feedback, or requests, please leave them down below.  Don't forget to follow my blog to stay up to date!  Follow me on social media...all the links are in the sidebar.  Also feel free to email me at geektochicbeauty@gmail.com.  Stay Beautiful, Stay True!

Geek2Chic - Christine 

Wednesday, March 4, 2015

What's in my Makeup? The Truth About Talc

Hello Beauties!

Today's blogpost will be discussing the truth about talc.  Several blogposts back I wrote about parabens.  All my research really opened my eyes.  I wanted to continue this series and figure out if these ingredients are harmful to your health.  Why the sudden push for "Talc-Free" products?  I will be sharing all my research and give you my thoughts and opinions.

What is Talc?

Talc is an ingredient found in cosmetics and personal care products.  It is used as an absorbent to decrease moisture and friction, help in makeup opacity, prevent caking, and help prevent rashes (ie. baby powder).

Talc is a natural occurring soft mineral.  It is made up of magnesium, silicon, and oxygen.

How do you spot them in your products?

Easy!  You just have to spot the word Talc on the ingredients label.  I found it in a majority of cosmetic products.  If it is present it will be one of the very first ingredients.

Is Talc Safe?

One of the main concerns about the safety of talc is potential asbestos contamination.  Asbestos and Talc are both naturally occurring minerals that can be found in close proximity.  Unlike Talc, asbestos is know to be cancer causing.   The FDA considers it unacceptable for the talc used in cosmetics to contain any asbestos.  They have done surveys to test cosmetic products for asbestos contamination.  These surveys found no asbestos fibers in cosmetic products containing talc.  

Another worry about talc is its possible link to lung and ovarian cancer. I went through a ton of research to figure out if this link is supported.  Well, thankfully for me, the International Agency for Research on Cancer (that is a subset of the World Health Organization) compiled a ton of research.  Based on their comprehensive review,  the agency found that inhaled talc (asbestos free) is not cancer causing in humans.  The agency found that the use of talc based body powders in the private area may possibly be cancer causing in humans.  Translation:  There is no increased risk for lung cancer but there is a possible increase risk for ovarian cancer.  

My Thoughts...

Now, the research on talc is so confusing!  There is a potential link between talc use in the private area and ovarian cancer.  However, I feel more research is needed to come to a strong conclusion.  The more I research and read, the more I am unsure.  Does that mean the cosmetics I use on my face are dangerous?  Or, should I only be worried about the products i use around my private areas? 

All in all, I am going to be more conscious about products that contain talc.  In the future, I am going to try and limit my use of talc containing cosmetics.  I need more evidence!!!!  Just remember that all the studies done thus far are inconclusive.  Please use your best judgement and be a smart consumer.

I hope you all found this blogpost to be helpful.  I want you all to be well informed, so now you can make your own decision.  Please leave any comments, feedback, or requests down below.  Stay Beautiful, Stay True!

Geek2Chic - Christine

Resources:

http://www.fda.gov/Cosmetics/ProductsIngredients/Ingredients/ucm293184.htm

http://www.cancer.org/cancer/cancercauses/othercarcinogens/athome/talcum-powder-and-cancer

http://cosmeticsinfo.org/HBI/26

http://monographs.iarc.fr/ENG/Monographs/vol93/mono93.pdf

Tuesday, February 24, 2015

Review: Physician's Formula Eye Booster Instant Lash Extension Kit

Hello Beauties!

I have always been in pursuit for long luscious lashes.  There are a few ways I try to achieve this.  On a day to day basis I use layer after layer of mascara to get both volume and length.  On special occasions, I brave false lashes.  It has taken a ton of practice, but I am starting to get the hang of it.  I even thought of lash extensions but it is costly so I have't explored that route yet.  Lately, I have seen a few brands come out with lash extension kits where you layer mascara with fibers to get the long voluminous lashes.  I was very excited when I saw Physician's Formula come out with a kit at the drugstore.  This blogpost will be a review and my thoughts on the Eye Booster Instant Lash Extension Kit.  


The Facts:

This product is relatively new to the market and is found in local drugstore retailers.  I have seen it in CVS, Rite Aid, and Ulta.  It is available in one color, Ultra Black.  It retails for $14.99 but if you're patient, Physician's Formula goes on sale and can be up to 40% off.  The package contains two tubes; one is the mascara and the other contains the fiber extensions.  

The Claims:

According to the Physician's Formula website, this product....


  • Experience a total lash transformation!  100% saw the most dramatic lash effect ever experienced with a mascara. 
  • 100% saw thicker, fuller, longer, more dramatic looking lashes after 3 weeks. 
  • 24 hour wear.
  • Brush on lash extensions in 2 minutes.
  • Hypoallergenic.  Paraben free.  Gluten free.  Dermatologist approved.  Ophthalmologist tested.  Fragrance free.  Safe of sensitive eyes and contact lens wearers.  Non-Comedogenic. 

Directions:

  1. Sweep lash boosting mascara on to upper lashes to prep for fibers and layer on lash boosting ingredients.  
  2. Brush on extensions to upper lashes while mascara is still wet to instantly build lashes. 
  3. Reapply lash boosting mascara to seal and set extensions.  Repeat 2&3 for life changing lashes!

In My Geeky Opinion:


I am going to talk about the mascara first.  If you look at the photo above the mascara wand comes out with a TON of excess product.  I had to clean the mascara wand off before using it, otherwise my lashes got very clumpy very quickly.  I think the stopper that cleans the mascara off in the tube should be a little narrower to clean the wand.  All in all this mascara is underwhelming.


Step One: One Coat of Physician's Formula Mascara
The fibers are incredibly messy.  The directions are to brush on the extensions, however I found the fibers get all over the place.  I found fibers IN my eye, over my upper and lower eyelids, and all over my cheeks and nose.  I found the best way to apply is to tap the excess fibers off.  Then I push the fibers onto the eyelashes when the mascara is still wet.  It's still messy but not as bad.  

Step Two: Mascara +  Fibers
Note all the excess fibers all over my cheek and nose.  

After the fibers go on, I applied one more coat of mascara.  I find I can only do this series of steps one time.  If I go back with the fibers and re-coat my lashes they look very spidery and clumpy.  I like clumpy to a point but I don't want to look like I only have four lashes.  

Step Three:  Mascara + Fibers + Mascara = The finished product
Nope, my skin is not that awful, its all the fibers!

With the mess the fibers make I use this product before I use any foundation or concealer.  This way I can brush the fibers off my face easily.  There is no way you can use this after you apply your face makeup. It will make a crazy mess and you will be forced to take your makeup off to re-apply.  Trust me!  I learned that the hard way.  

All in all, the finished product did not wow me.  I expected a huge difference but it was incredibly underwhelming.  I pulled out my holy grail Lancome Grandiose Mascara (I have a full blogpost with a detailed review) to compare the finished product.  I used two coats and I feel that it looks better without the mess!  

Two Coats of Lancome Grandiose Mascara

The Final Verdict:

I am not a fan of this product.  First off, the mess this product makes is a huge problem.  I do not wear contact lenses nor do I have sensitive eyes but the product was everywhere including inside my eyes.  I don't know about you, but I don't like foreign objects floating around inside my eye.  The final product was meh....not terrible but not great.  My favorite mascara alone gives me a better look with no mess.  Plus it takes me much less time to put it on.  All in all, I do not recommend this product, especially for those with sensitive eyes or contact lens users.  I will stick to my normal mascara and brave the false lash application for the special occasions.  

If you tried this product out, let me know what you thought.  I hope you all enjoyed this blogpost.  If you have any questions, comments, feedback, or requests, please leave them in the comment section down below.  Don't forget to follow my blog to stay up to date!  You can also follow me on Instagram, Twitter, Pintrest, and Tumblr for updates, hauls, and mini-reviews.  All the links are in the sidebar.  Also feel free to email me at geektochicbeauty@gmail.com.  Stay Beautiful, Stay True!

Geek2Chic - Christine 

Wednesday, February 18, 2015

Top 10 Drugstore Products

Hello Beauties!

I recently re-organized my entire makeup collection.  I noticed there are some drugstore makeup items that have really stood out and are as good or even better than high-end products.  This blogpost will contain my humble opinions on the top ten drugstore products that provide wonderful quality at affordable prices.     

Maybelline Color Sensational Lipcolor 
$5.49 - 7.49


These lipsticks are simply sensational.  There is such an array of colors and collections being released all the time.  The Rebel Bloom and Creamy Matte collections are the latest to be released.  You can find any color you want and, for the price, it can't be beat!  The lipsticks are very pigmented and wear well throughout the day.  


Rimmel London Stay Matte Pressed Powder
$3.97 - 5.29


This is a finely milled pressed powder that helps to control shine throughout the day.  I use this after I apply my foundation in the areas where I usually become oily.  It is also good for touch-ups throughout the day.  


L'Oreal Paris Infallible Gel Laquer Liner in Blackest Black 
$6.99 - 9.79


This is the blackest black gel liner, high-end or drugstore.  I love the matte dark liner look that doesn't budge and this liner does just that.  

L'Oreal Paris Telescopic Mascara
$7.99 - 10.59 


I have purchased this mascara time and time again.  I am a mascara mixer so I typically combine different mascaras to get both volume and length.  This is a great lengthening mascara.  There are several versions of this mascara; I just purchased the carbon black version.   

Maybelline Fit Me Concealer 
$3.99 - 7.29 


This is one of the best concealers I have ever tried.  I have very dark circles and this covers them up quite well.  Honestly, I have never found a concealer that doesn't settle into my fine lines but I think those fine lines are just a result of my medical school/residency days...oh well.

e.l.f. Studio High Definition Undereye Setting Powder 
$3.00


This is a great under-eye setting powder for the price.  It is a finely milled powder that sets concealer wonderfully.  This powder has blue and gold shimmer mixed into the powder.  You don't notice it at all when you apply it but I believe it helps to diffuse light to get a brighter and more awake look.

L'Oreal Paris Brow Stylist Plumper 
$7.97 - 8.99 


I have already reviewed this product in an earlier blogpost.  I really enjoy this product alone or in conjunction with my brow pencils.  It really holds your brows in place while adding some definition and color to plump them up.    

Milani Baked Blush in Luminoso 
$6.97 - 8.49 


I have tried several of the Milani blushes but Luminoso is by far the best.  It is peachy with a bit of shimmer that makes you look...Luminous!  Even on my medium olive complexion it gives me a natural flush.  I tend to use this with my everyday looks.

L'Oreal Paris Infallible 24 hour Eyeshadow 
$6.39 - 8.29


There is a wide array of colors in this collection.  These shadows are very pigmented and long wearing.  My go to shade is Amber Rush which is a rose bronze color that I use over the lid and even in the crease.  It is that perfect one shade everyday look when I am in a hurry.  Another shade I really enjoy is Iced Latte.  It is good on the lid and I even use it as a highlighter lightly over my cheekbones.


Maybelline Color Tattoo 24 hour Cream Gel Shadow 
$5.29 - 6.99     


I love this product because it is so versatile.  I have used it as a shadow base to intensify an eye look.  I have used it alone for a quick, on the go look.  It can also be applied as a gel liner with an angled brush.  There are so many colors with new limited edition collections coming out all the time.  It is long lasting and creamy.  Word to the wise, keep the lid screwed on tightly and store it upside down.  I find this is the best method to keep the product from drying out.  


I hope you all enjoyed this blogpost.  If you have any questions, comments, feedback, or requests, please leave them in the comment section down below.  Let me know what your drugstore favorites are.  Don't forget to follow my blog to stay up to date!  You can also follow me on Instagram, Twitter, Pintrest, and Tumblr for updates, hauls, and mini-reviews.  All the links are in the sidebar.  Also feel free to email me at geektochicbeauty@gmail.com.  Stay Beautiful, Stay True!

Geek2Chic - Christine